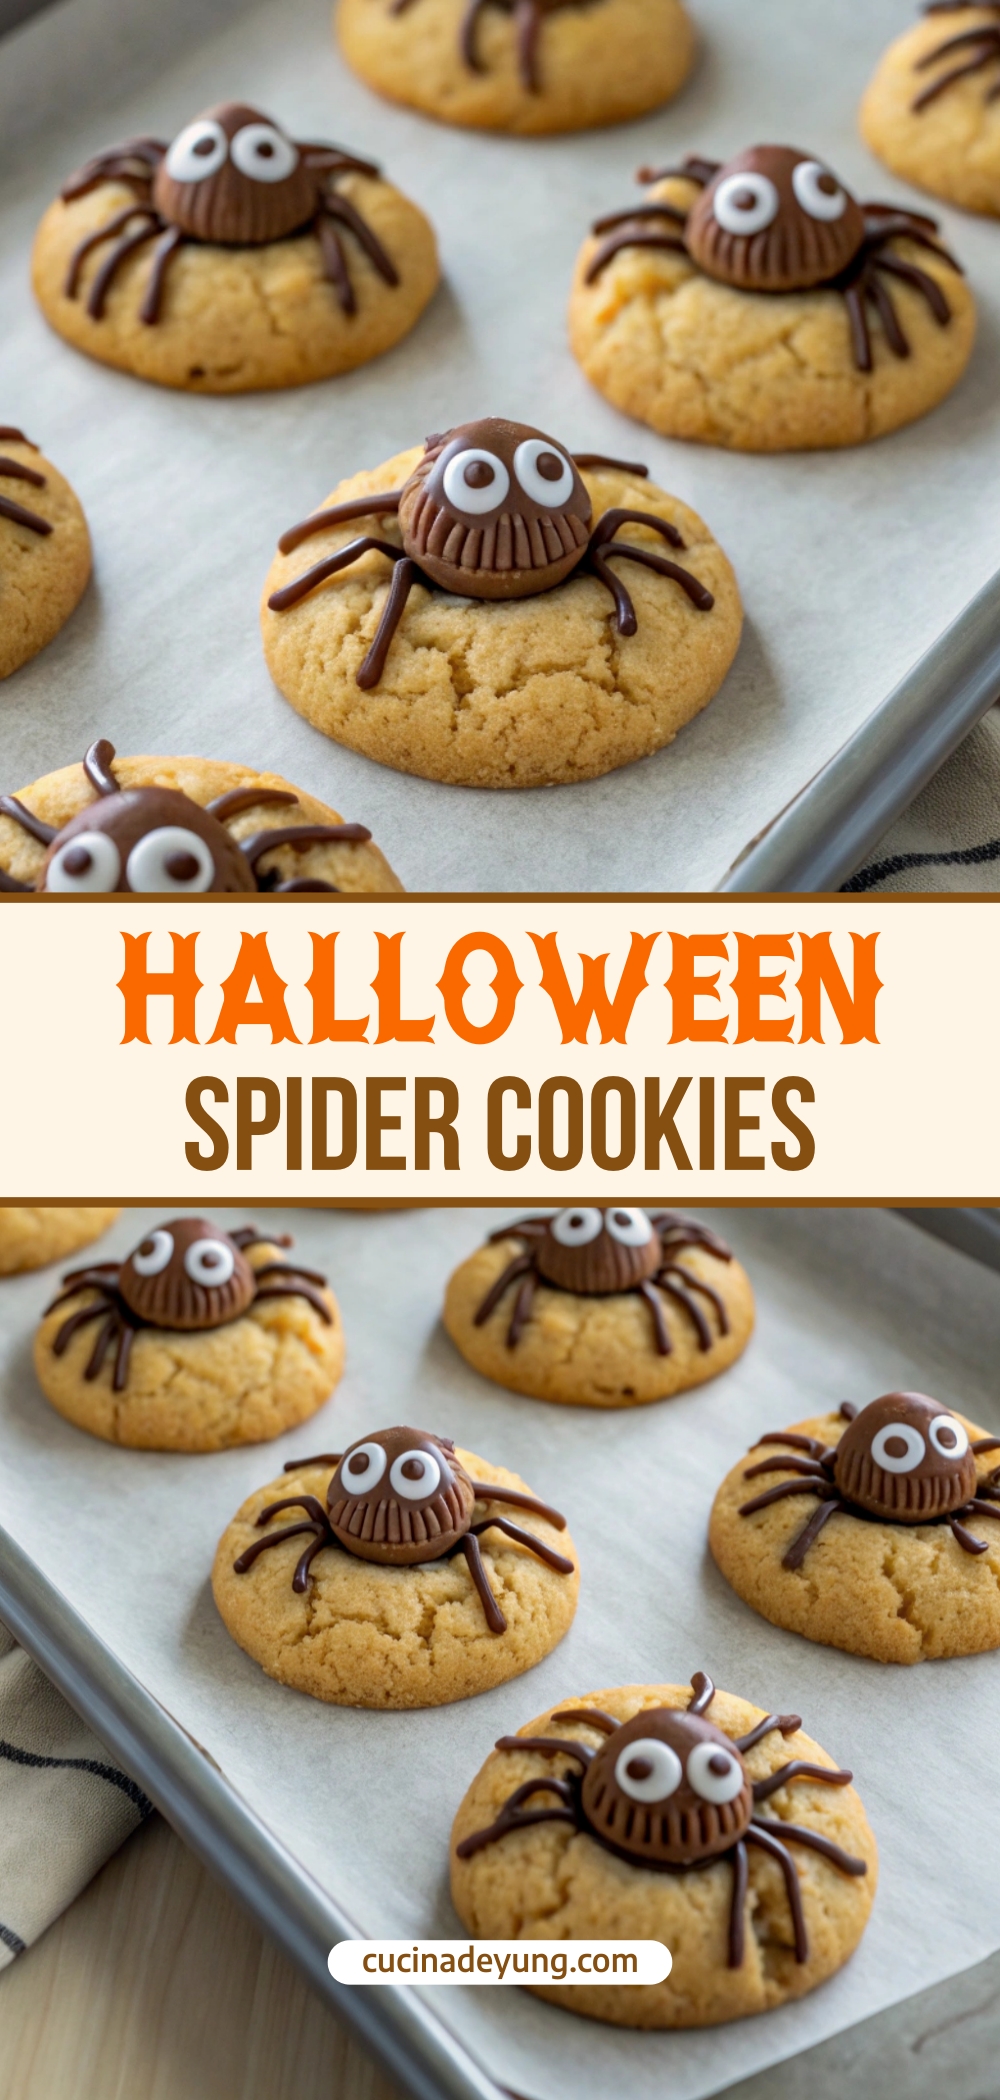
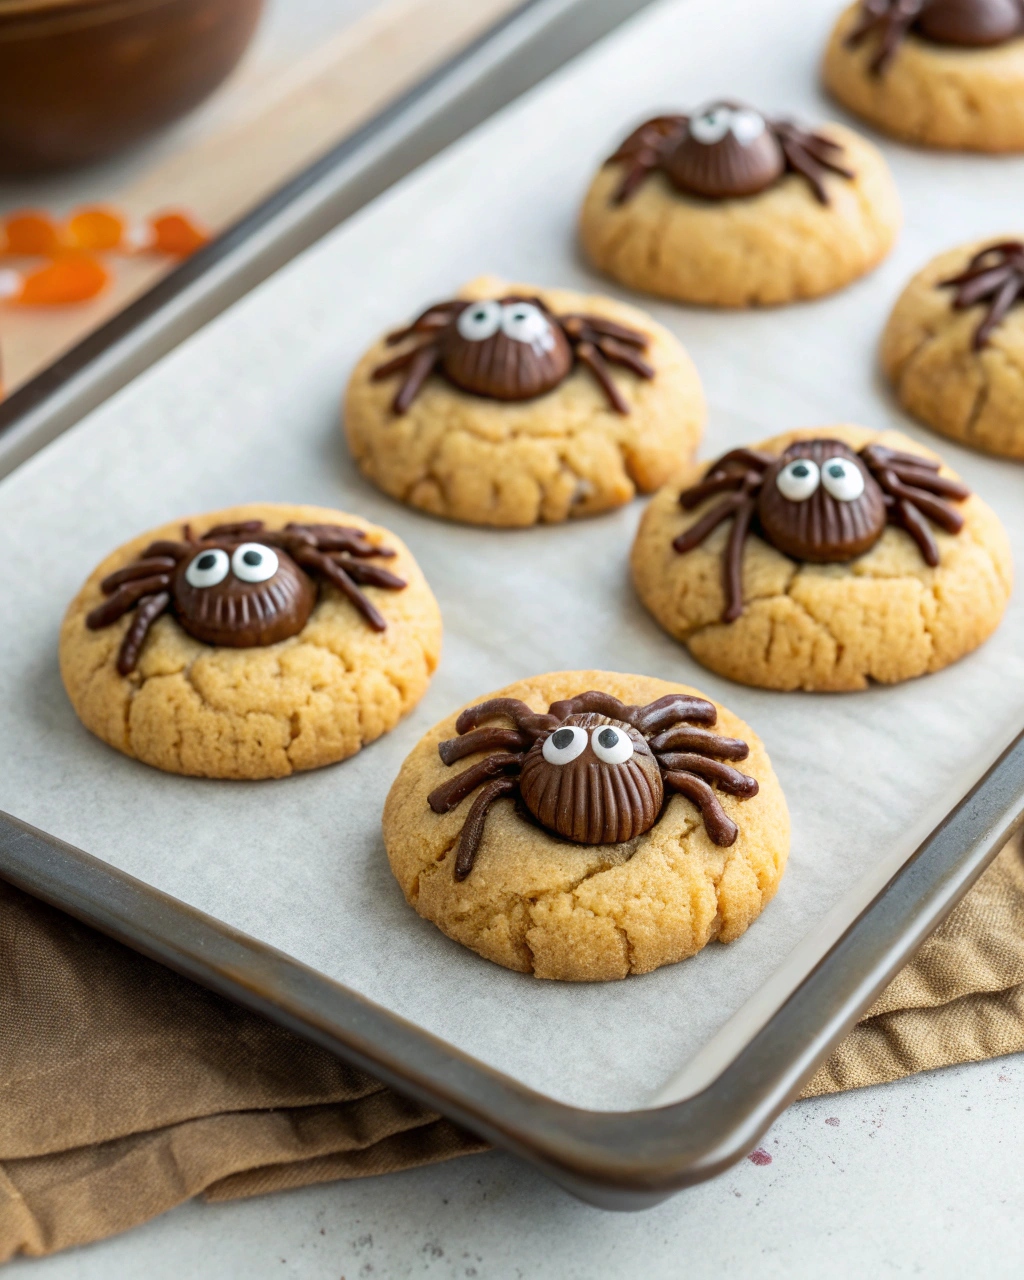
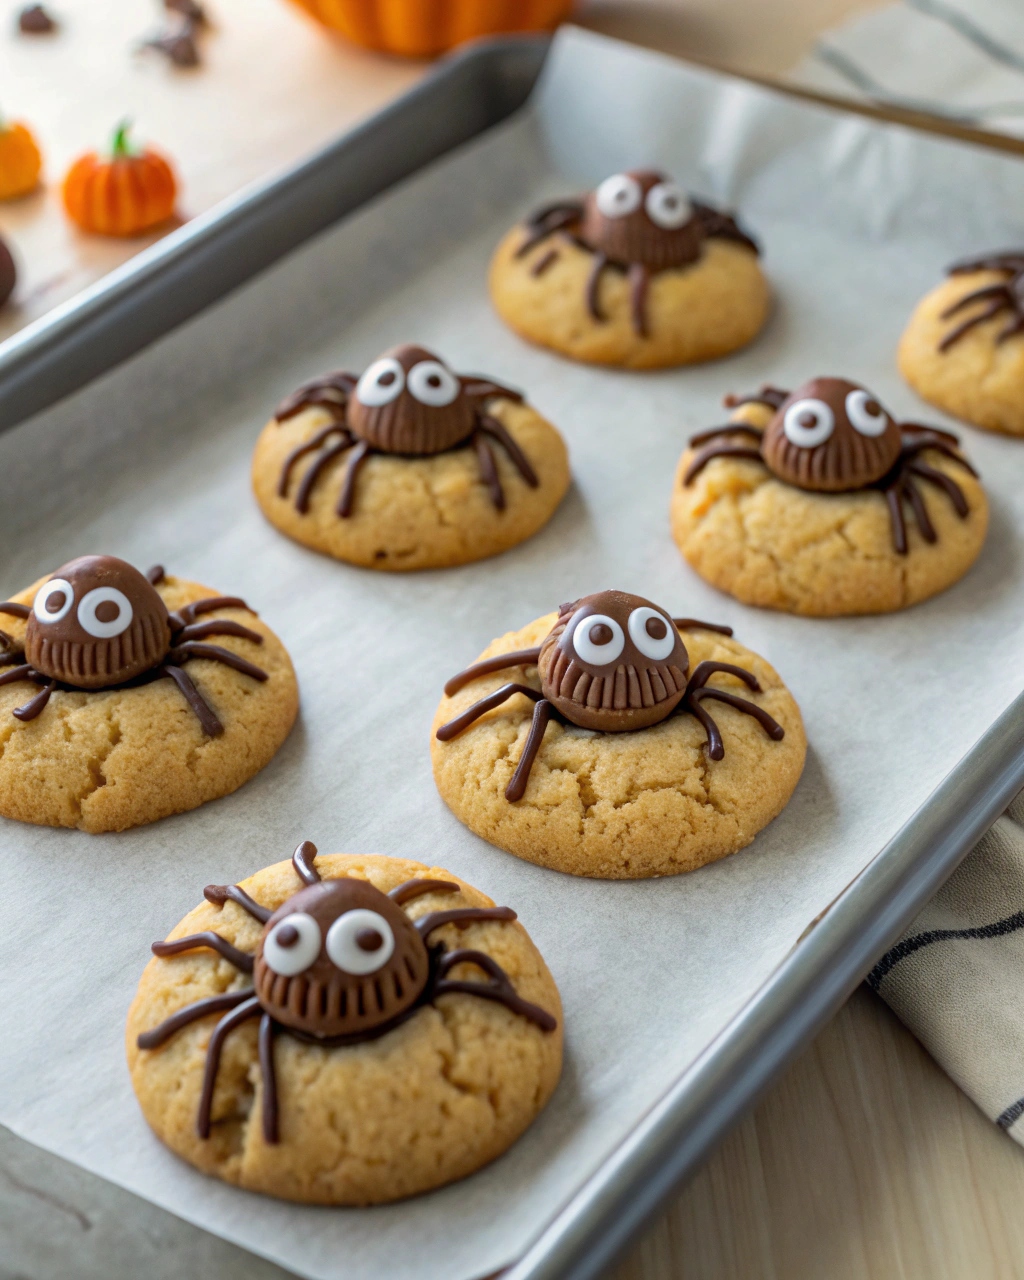
These Halloween Spider Cookies are soft, chewy peanut butter cookies topped with mini chocolate peanut butter cups and candy eyes for the cutest spooky dessert ever. This easy Halloween treat is fun to make with kids, perfect for parties, and guaranteed to disappear fast. A must-try for anyone who loves chocolate and peanut butter cookies with a festive twist.
Why You’ll Love This Recipe
This recipe nails the balance of festive fun and incredible flavor. The cookies bake up chewy inside with crisp edges, while the peanut butter and chocolate combo is pure nostalgia. They’re simple to make, great for kids to decorate, and guaranteed to be the cutest treat on your Halloween dessert table.
Halloween Spider Cookies
There’s no better way to celebrate spooky season than with a batch of Halloween Spider Cookies — the most adorable, crave-worthy cookies you’ll make this fall. These soft and chewy peanut butter cookies are rolled in sugar, baked until golden, and topped with mini Reese’s cups and candy eyes to create a “spider” that’s equal parts cute and delicious.
This recipe has become a Halloween baking trend across TikTok, Pinterest, and Instagram because it’s not just about looks — these cookies actually taste incredible. Every bite gives you that melt-in-your-mouth peanut butter goodness paired with rich chocolate, a combo that’s impossible to resist.
They’re the kind of Halloween dessert that makes everyone smile — from kids decorating at the kitchen table to adults sneaking “just one more.” The texture is what makes them unforgettable: crisp edges, a soft chewy center, and that perfect bite of creamy chocolate on top.
If you love classic peanut butter cookies, this version takes them to the next level. The secret is in the balance — shortening keeps the cookies light and tender, while brown sugar adds warmth and caramel notes. A touch of milk ensures the dough stays soft and easy to shape.
Freezing the mini peanut butter cups before baking is another pro tip — it keeps them perfectly formed when pressed into the warm cookies, creating that signature “spider body” look. Once cooled, a drizzle of melted chocolate forms the legs, and candy eyes bring the spooky-cute personality to life.
These cookies aren’t just treats; they’re a Halloween activity the whole family can enjoy. You can make the dough ahead, bake in batches, or let everyone decorate their own spiders. They’re forgiving, festive, and always a hit at school parties, potlucks, and Halloween movie nights.
From a flavor standpoint, you get the best of both worlds — the nostalgic comfort of peanut butter cookies with the visual fun of Halloween desserts that look straight out of a bakery. Each cookie is a little work of edible art, and the process is just as enjoyable as the final bite.
Want to get creative? Try using dark chocolate peanut butter cups for a bolder taste, or swap in almond butter for a nutty twist. You can even use gluten-free flour blends to make them accessible for everyone at your party.
When it comes to presentation, simplicity works best. Arrange the cookies on a rustic wooden board or dark platter, maybe sprinkle some candy corn or mini pumpkins around, and you’ve got an eye-catching Halloween dessert display worthy of social media.
Even though they look fancy, these cookies are foolproof. You don’t need special tools — just a mixing bowl, baking sheet, and a steady hand for the chocolate legs. The steps are straightforward, and the results look like you spent hours.
What makes these cookies so special is the emotional connection they bring. They capture the excitement of Halloween — that mix of fun, comfort, and nostalgia we all crave this time of year. Each spider cookie tells a tiny story of joy and playfulness baked right in.
Whether you’re planning a Halloween party, baking with kids, or just want a cozy fall weekend project, these Halloween Spider Cookies deliver big smiles and even bigger flavor. They’re festive, easy, and downright irresistible — everything you want in a Halloween baking recipe.
So, grab your peanut butter, unwrap those mini Reese’s cups, and get ready to bake the most fun cookies of the season. Because once these Halloween Spider Cookies hit the table, they won’t last long.
Servings & Time
Servings: 24 cookies
Prep Time: 25 minutes
Chill Time: 15 minutes (for candies)
Cook Time: 10 minutes
Total Time: 50 minutes
Ingredients
-
1/2 cup creamy peanut butter
-
1/2 cup vegetable shortening (or unsalted butter for a richer taste)
-
1/2 cup light brown sugar, packed
-
1/2 cup granulated sugar
-
1 large egg
-
2 tablespoons milk
-
1 teaspoon pure vanilla extract
-
1 3/4 cups all-purpose flour
-
1 teaspoon baking soda
-
1/2 teaspoon salt
-
1/4 cup granulated sugar (for rolling)
-
48 miniature Reese’s peanut butter cups, unwrapped and frozen
-
1/2 cup semi-sweet chocolate chips (for decorating legs)
-
96 small candy eyes
Instructions
-
Prepare the candies:
Unwrap and freeze the Reese’s cups for at least 15 minutes before baking. This keeps them firm when placed on the warm cookies. -
Preheat the oven:
Set your oven to 375°F (190°C). Line baking sheets with parchment paper or silicone mats. -
Cream the base:
In a large bowl, beat together the shortening, peanut butter, brown sugar, and granulated sugar until fluffy — about 2–3 minutes. The mixture should look creamy and pale. -
Add wet ingredients:
Mix in the egg, milk, and vanilla until fully combined. -
Combine the dry ingredients:
In a separate bowl, whisk the flour, baking soda, and salt. Gradually add to the wet mixture, stirring until just incorporated. Don’t overmix. -
Form the cookies:
Scoop the dough into 1-inch balls. Roll each in granulated sugar, then place 2 inches apart on the baking sheet. -
Bake:
Bake for 8–10 minutes, or until the edges are golden and the tops just start to crack. -
Add the “spider bodies”:
Remove the cookies from the oven and immediately press a frozen Reese’s cup into the center of each. Let the cookies rest on the baking sheet for 5 minutes before transferring to a wire rack. -
Decorate:
Melt the chocolate chips in a microwave-safe bowl in 20-second bursts, stirring until smooth. Use a piping bag or zip-top bag with the corner snipped off to pipe 4 legs on each side of the Reese’s cup. Attach candy eyes with a dab of melted chocolate. -
Cool and serve:
Let the chocolate set completely before serving. Store cookies in an airtight container at room temperature for up to 4 days.
Tips
-
Substitutions:
Swap peanut butter for almond or sunflower butter if needed. Use butter instead of shortening for richer flavor (but chill dough before baking). -
Make-Ahead:
Bake cookies up to 2 days ahead; decorate before serving. Or freeze dough balls for up to 1 month — bake straight from frozen, adding 1–2 extra minutes. -
Serving Idea:
Arrange on a black or orange platter with Halloween candies scattered around. Great for parties or trick-or-treat night. -
Common Mistakes:
Don’t skip freezing the peanut butter cups — they’ll melt too fast. And don’t overbake; the cookies should stay soft and chewy.
Halloween Spider Cookies
Ingredients
- 1/2 cup creamy peanut butter
- 1/2 cup vegetable shortening or unsalted butter for a richer taste
- 1/2 cup light brown sugar packed
- 1/2 cup granulated sugar
- 1 large egg
- 2 tablespoons milk
- 1 teaspoon pure vanilla extract
- 1 3/4 cups all-purpose flour
- 1 teaspoon baking soda
- 1/2 teaspoon salt
- 1/4 cup granulated sugar for rolling
- 48 miniature Reese’s peanut butter cups unwrapped and frozen
- 1/2 cup semi-sweet chocolate chips for decorating legs
- 96 small candy eyes
Instructions
- Prepare the candies: Unwrap and freeze the Reese’s cups for at least 15 minutes before baking. This keeps them firm when placed on the warm cookies.
- Preheat the oven: Set your oven to 375°F (190°C). Line baking sheets with parchment paper or silicone mats.
- Cream the base: In a large bowl, beat together the shortening, peanut butter, brown sugar, and granulated sugar until fluffy — about 2–3 minutes. The mixture should look creamy and pale.
- Add wet ingredients: Mix in the egg, milk, and vanilla until fully combined.
- Combine the dry ingredients: In a separate bowl, whisk the flour, baking soda, and salt. Gradually add to the wet mixture, stirring until just incorporated. Don’t overmix.
- Form the cookies: Scoop the dough into 1-inch balls. Roll each in granulated sugar, then place 2 inches apart on the baking sheet.
- Bake: Bake for 8–10 minutes, or until the edges are golden and the tops just start to crack.
- Add the “spider bodies”: Remove the cookies from the oven and immediately press a frozen Reese’s cup into the center of each. Let the cookies rest on the baking sheet for 5 minutes before transferring to a wire rack.
- Decorate: Melt the chocolate chips in a microwave-safe bowl in 20-second bursts, stirring until smooth. Use a piping bag or zip-top bag with the corner snipped off to pipe 4 legs on each side of the Reese’s cup. Attach candy eyes with a dab of melted chocolate.
- Cool and serve: Let the chocolate set completely before serving. Store cookies in an airtight container at room temperature for up to 4 days.
Notes
-
Substitutions:
Swap peanut butter for almond or sunflower butter if needed. Use butter instead of shortening for richer flavor (but chill dough before baking). -
Make-Ahead:
Bake cookies up to 2 days ahead; decorate before serving. Or freeze dough balls for up to 1 month — bake straight from frozen, adding 1–2 extra minutes. -
Serving Idea:
Arrange on a black or orange platter with Halloween candies scattered around. Great for parties or trick-or-treat night. -
Common Mistakes:
Don’t skip freezing the peanut butter cups — they’ll melt too fast. And don’t overbake; the cookies should stay soft and chewy.