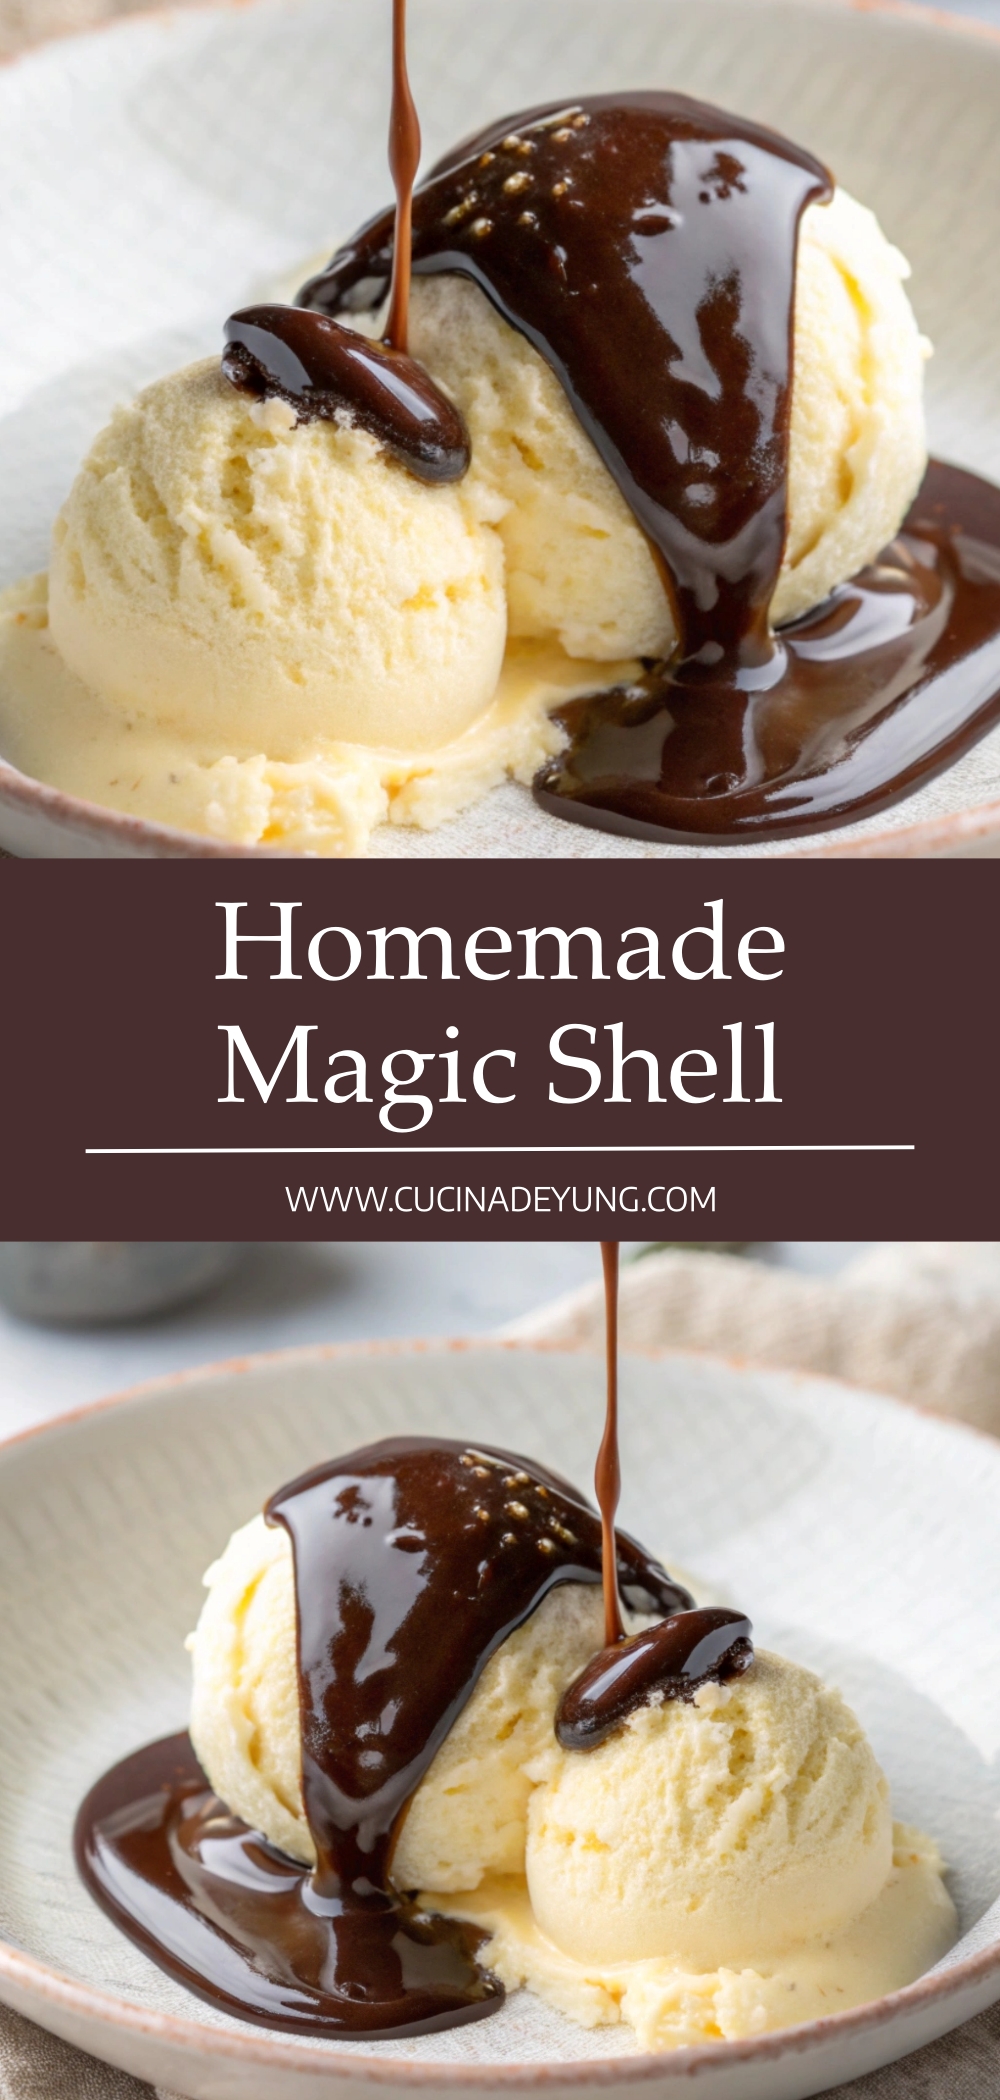
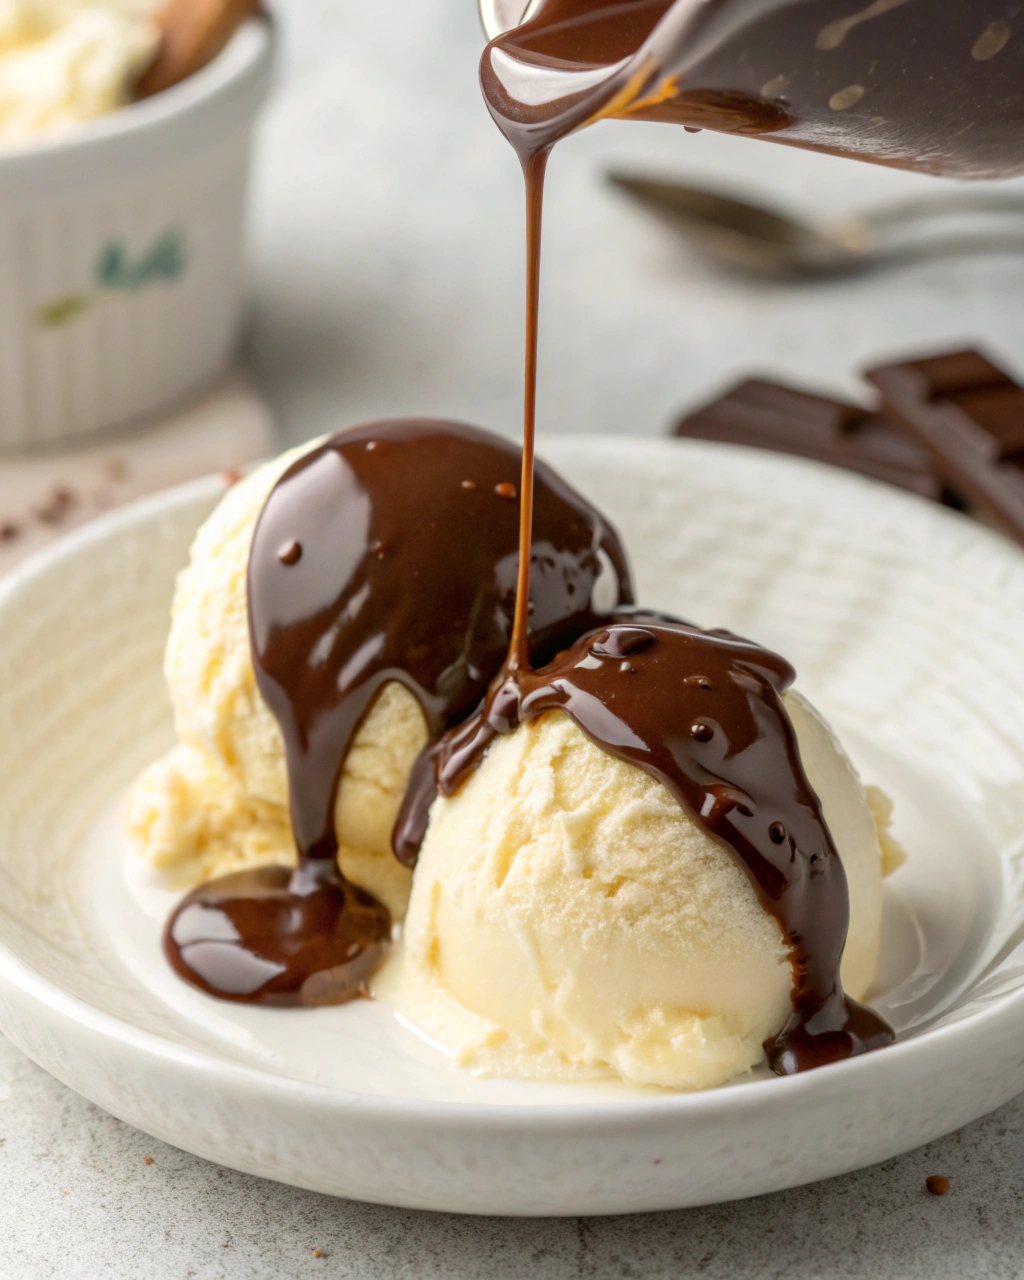
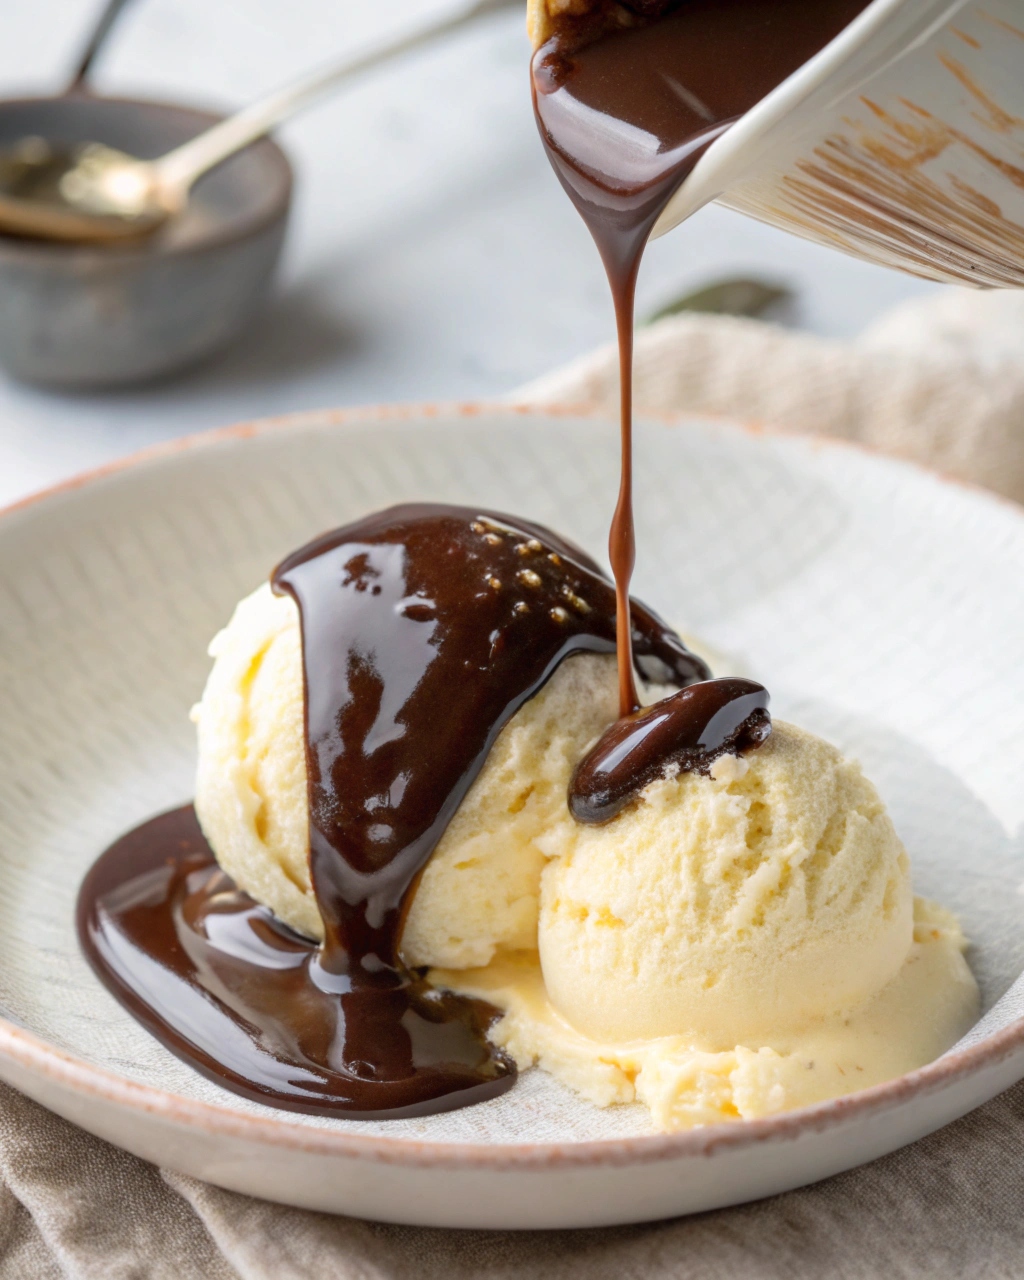
Transform your dessert game with this Homemade Magic Shell, a nostalgic 2-ingredient wonder that creates a crisp, crackly chocolate coating the second it hits cold ice cream. By blending high-quality chocolate with pure coconut oil, you create a silky ganache that defies physics—transforming from a luscious liquid into a solid, snappy shell in under thirty seconds. It’s the ultimate DIY ice cream topping that tastes infinitely better than the store-bought version and contains zero mysterious preservatives.
Why You Will Love This Recipe
You will love this recipe because it is the definition of “minimal effort, maximum reward.” With only two pantry staples and a microwave, you can create a gourmet chocolate hard shell that feels like a science experiment in the kitchen. It’s incredibly versatile—works with dark, milk, or white chocolate—and is naturally gluten-free and can easily be made vegan. Plus, it’s a family-friendly activity that turns a simple bowl of vanilla ice cream into a viral-worthy “sundae bar” experience that kids and adults will obsess over.
Homemade Magic Shell
If you are looking for the best homemade magic shell recipe, you’ve landed in the right place. This easy chocolate hard shell is a classic childhood favorite that has made a massive comeback for anyone seeking healthy dessert alternatives and DIY kitchen projects. Whether you’re browsing for ice cream topping ideas or looking for a quick 2-ingredient dessert, this recipe delivers that iconic “crack” every single time.
The science behind this chocolate coating for ice cream is fascinating yet simple. The secret lies in the natural properties of coconut oil. Because coconut oil has a high amount of saturated fat, it remains solid at room temperature and freezes almost instantly when it touches anything cold. This creates that satisfying snap-action chocolate shell that store-bought brands try to replicate with stabilizers and waxes.
When it comes to selecting the best chocolate for magic shell, the choice is yours. Semi-sweet chocolate chips offer a deep, rich flavor that balances sugary vanilla bean ice cream, while milk chocolate chips provide a creamy, nostalgic taste reminiscent of a dip-top cone from a local dairy bar. For those following a vegan dessert recipe, simply swap in dairy-free chocolate chips to make this a plant-based ice cream topping.
This recipe is a cornerstone of budget-friendly kitchen hacks. Making your own magic shell at home is significantly cheaper than buying the plastic bottles at the grocery store, and you have total control over the quality of the ingredients. There are no high-fructose corn syrups or artificial flavorings here—just pure chocolate bliss.
Texture is everything in a gourmet sundae. The contrast between the velvety, melting ice cream and the rigid, crunchy chocolate dip is what makes this a consistent favorite. It’s the perfect addition to a summer dessert board or a cozy family movie night.
For the best cooking techniques, the microwave is your best friend. Heating in short increments prevents the chocolate from seizing or burning, ensuring a smooth melted chocolate consistency. If you prefer a stovetop magic shell, a simple double boiler works beautifully to keep the heat gentle and even.
You can also customize this DIY ice cream sauce with different flavor extracts. A drop of peppermint oil creates a mint chocolate hard shell, while a pinch of sea salt enhances the richness of the cocoa. It’s a versatile recipe that adapts to any holiday or craving.
Serving this dish provides an instant emotional connection to summer vacations and boardwalk treats. There is something uniquely joyful about tapping a spoon against a hardened chocolate dome and watching it shatter. It’s a simple pleasure that elevates a basic snack into a memorable moment.
For those hosting a birthday party sundae bar, you can make a large batch of this hard-shell topping in advance. It stays liquid at room temperature, making it easy to pour throughout the evening. Just remember not to refrigerate it, or it will turn into a solid block before it even hits the ice cream!
This recipe also doubles as a chocolate dip for fruit. If you have chilled strawberries or frozen banana slices, dipping them into this mixture creates a professional-looking chocolate-covered fruit snack in seconds. It’s a healthy snack hack that parents swear by for getting kids to eat more fruit.
In the world of high-quality home cooking, “Magic Shell” remains a top request because people are tired of processed additives. By using refined coconut oil, you get a neutral flavor that lets the chocolate shine. If you prefer a hint of tropical flavor, unrefined coconut oil is the way to go.
The sustainability of making your own toppings shouldn’t be ignored. By reusing a glass jar for your homemade chocolate sauce, you’re reducing plastic waste—one delicious scoop at a time. It’s a win for your palate and the planet.
Whether you’re a food enthusiast looking for a quick treat or a home cook wanting to impress guests, this chocolate hard shell recipe is a staple. It’s foolproof, fast, and undeniably fun.
Ultimately, the Homemade Magic Shell is about bringing a little bit of magic back into the kitchen. It proves that you don’t need a long list of ingredients to create something extraordinary. Grab your favorite bowl of ice cream and get ready for the ultimate crunch.
Servings & Time
-
Servings: Makes approx. 2.25 cups of sauce
-
Prep Time: 2 minutes
-
Cook Time: 2 minutes
-
Total Time: 4 minutes
Ingredients
-
2 cups Chocolate Chips (Milk chocolate or Semi-sweet)
-
1/4 cup Coconut Oil (Solid state)
Instructions
-
Combine Ingredients: Place the chocolate chips and the solid coconut oil into a medium-sized, microwave-safe glass bowl. Ensure the bowl is completely dry, as any moisture can cause the chocolate to seize.
-
Gentle Melting: Place the bowl in the microwave and heat on high in 30-second increments. After each burst, remove the bowl and give it a thorough stir.
-
Achieve Silkiness: Continue the heating and stirring process until the mixture is completely melted, glossy, and smooth. This usually takes between 1.5 to 2 minutes total.
-
The Magic Pour: Let the mixture sit for a minute to cool slightly, then drizzle generously over your favorite cold ice cream.
-
The Freeze: Wait about 20–30 seconds. You will see the glossy liquid transform into a matte finish—this is the shell hardening! Tap it with your spoon to enjoy the crack.
-
Storage: Pour leftovers into a glass jar. Store at room temperature. If it solidifies due to a cold kitchen, simply microwave for 10 seconds to reliquefy.
Tips
-
Refined vs. Unrefined: Use refined coconut oil for a flavorless result, or unrefined for a light coconut taste.
-
Don’t Chill: Never store this in the refrigerator, as it will turn into a solid brick that is difficult to use.
Homemade Magic Shell
Ingredients
- 2 cups Chocolate Chips Milk chocolate or Semi-sweet
- 1/4 cup Coconut Oil Solid state
Instructions
- Combine Ingredients: Place the chocolate chips and the solid coconut oil into a medium-sized, microwave-safe glass bowl. Ensure the bowl is completely dry, as any moisture can cause the chocolate to seize.
- Gentle Melting: Place the bowl in the microwave and heat on high in 30-second increments. After each burst, remove the bowl and give it a thorough stir.
- Achieve Silkiness: Continue the heating and stirring process until the mixture is completely melted, glossy, and smooth. This usually takes between 1.5 to 2 minutes total.
- The Magic Pour: Let the mixture sit for a minute to cool slightly, then drizzle generously over your favorite cold ice cream.
- The Freeze: Wait about 20–30 seconds. You will see the glossy liquid transform into a matte finish—this is the shell hardening! Tap it with your spoon to enjoy the crack.
- Storage: Pour leftovers into a glass jar. Store at room temperature. If it solidifies due to a cold kitchen, simply microwave for 10 seconds to reliquefy.
Notes
- Refined vs. Unrefined: Use refined coconut oil for a flavorless result, or unrefined for a light coconut taste.
- Don't Chill: Never store this in the refrigerator, as it will turn into a solid brick that is difficult to use.